Perishables, fragile items, and the need to eat at least a couple times a day: these are just a few reasons why it can be so difficult to pack the kitchen and surrounding spaces. However, as we build up and share even more helpful dining room and kitchen moving tips, you can make this challenging task look easy.
Dining Room Moving Tips
Although moving can be quite overwhelming, it’s mostly a matter of knowing where to start. This is certainly applicable when considering dining room and kitchen moving tips. If your eating spaces have cabinetry with crystal, decorative displays, and aesthetic items, this is a great place to get the ball rolling. Be sure to pack up anything without an essential function and reserve it for use after the move is completed. 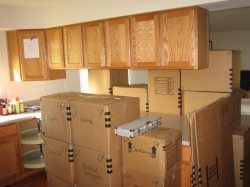
For reliable protection, we strongly recommend bubble wrap, packing peanuts, and other proven packing materials to cushion your most breakable items. Although we’ve seen DIY masters tout success and a two-for-one approach using extra socks, t-shirts, and other soft items to wrap fragile belongings, we’re interested in your experiences DIYing it. If you’ve had success or trouble here, let us know — we’re still collecting more data before we would recommend anything other than materials designed to provide maximum cushion. Our goal is always to deliver your items just like they were packed, so we rely on the best packing materials we can purchase.
Fragile items aren’t the only ones that can lead to a mess if not handled properly though. Most of us have at least one “junk drawer”, so remember zip-seal bags make containment pretty easy and plastic wrap can work, too. For larger items like china cabinets and buffets, use painters tape to keep doors and drawers closed. This can save you from property damages and a great deal of hassle as you keep moving parts tightly controlled.
Kitchen Moving Tips
If you want to know the best kitchen moving tips, any worthwhile list would start with this: do not underestimate the time and thought needed to pack up the kitchen.
Be sure to start early, identifying dishware, utensils, kitchen tools, and nonperishable food items you can do without for a while. At the early onset of your plans to move, keep a look out for dry goods you can donate to food pantries and anything else needing tossed out. It may seem to only make a small dent, but if you do this each time you make a meal, you will save yourself a great deal of trouble on moving day.
As you start to sort through everything, remember it does get easier to identify what you can get by with — all-purpose or multi-purpose items — so you can get to packing pots and pans, boxing up baking items, and plastic wrapping the bulk of your utensils in their tray. With plenty of cushion at the bottom of your moving boxes and moving hacks like using dish towels like sleeves or separators, consider packing your plates vertically like records. This will keep their total weight from crushing downward.
Mugs and glasses can be among the trickiest to pack, but our best kitchen moving tips for them revolve around one core idea: it’s always better to pack more boxes more carefully than to unpack less boxes with more chance for damage. Newspaper or packing paper is your best friend in this instance. Wrap each mug or glass individually and only stack or fit items together when you have the most careful arrangement so they have an adequate buffer.
Lastly, as with most packing around the house, some kitchen moving tips are great for every room, like sharpie labeling and liquid containment. A few seconds while packing will save your minutes and potentially hours later when you need something without the typical unpacking hassle. Labeling with sharpie will help keep you sane as you look for items later and containing liquids with plastic bags, zip-seal bags, and plastic wrap beneath screw-on lids will help reduce the chances for messes.
For more dining room and kitchen moving tips, we invite you to contact one of our moving specialists today for a free estimate and stay tuned for more from our blog.